Email Case Handling Agentic Solution
Email Case Handling Agentic Solution is a fully agentic business application built entirely on DRUID technology. Powered by DRUID’s native LLMs (Becus) and compatible with external models (GPT), this solution automates the email support lifecycle — from intelligent triage and parameter extraction to multilingual responses and case management.
Customers and employees can:
- Send support requests via email in any language.
- Attach images, PDFs, or other documents; attachments are securely stored, translated, and analyzed to extract relevant information.
- Receive automatic Knowledge Base suggestions and translated replies.
- Track case progress and continue the conversation in the same thread.
Helpdesk Agents and Managers can:
- Review automatically-created email cases with original and translated content.
- Validate automatically extracted parameters, reply,, or close cases.
- Monitor SLA compliance, case volumes, and agent performance through dashboards.
Key Components
The key components of this solution include:
- Backend Database. DRUID Data Services stores all case records, activity stream, and structured parameters.
- Human Agent & Manager Workspaces. Comprehensive, role-based workspaces for Helpdesk staff.
- Helpdesk Manager View: Provides unrestricted access to all workspace areas: Reporting, Cases, Contacts, Agents, and Queues for full oversight.
- Helpdesk Agent View: Offers a focused interface with access limited to Cases and Contacts, streamlining case management tasks.
- Email Channel. Integration Processes emails sent to a configured address and creates cases automatically.
- Knowledge Base Integration. An integrated KB with standard responses to resolve common issues automatically.
- Attachment Storage & Processing. Secure storage for attachments in Azure Blob Storage. Also, the attachments are translated into the bot’s default language and analyzed to extract parameters.
- LLM Apps (Becus & Druid GPT). Drive text understanding, summarization, and response generation.
Business Workflow
- Email Reception — Messages arrive at the configured address and are captured by the Email Channel.
- Triage & Language Detection — The system identifies language, intent, and priority, and summarizes the main issue.
- Attachment Analysis — Files and images are securely stored, translated to the bot default language, and analyzed to extract required parameters.
- Case Creation — A case is created in the backend. All collected parameters are stored in the case form for easier integration with other systems, while in the description the interaction history is logged.
- KB Suggestion or Request for Info — A KB match may generate an automatic reply; if required information is missing, the system asks the user for the missing details.
- Human Review & Resolution — Agents review extracted information and attachments, respond if needed, then resolve the case.
- Closure & Reporting — Case closure is logged with timestamps and SLA checks; dashboards provide analytics.
Reliability and LLM Retry Mechanism
To ensure a robust and uninterrupted user experience, the solution has a built-in retry mechanism. During any interaction that requires an LLM, if the primary model fails to respond due to a timeout or error, the system automatically retries the request using a pre-configured fallback LLM. This process is seamless to the user and guarantees business continuity.
Plug and Play Customization
This solution is designed to be "plug and play” but also highly adaptable. An administrator can easily tailor the core components of the ticketing system directly from the Admin Workspace without requiring any code changes. This allows you to quickly align the solution with your specific business processes.
You can modify:
- Case Statuses: Define your own case lifecycle stages (e.g., New, Awaiting Triage, Resolved).
- Queues & Agents: Create and manage agent queues and assign individual agents to them.
- Categories & Subcategories: Customize the case classification taxonomy to match your services.
- Parameters: Add or change the specific data fields that need to be collected for different case types.
- SLAs: Adjust the time intervals for first response and case closure to meet your business goals.
- Activity Types: Define the different types of interactions that can be logged in the activity stream.
Prerequisites
Before you begin, make sure the following requirements are met:
- A DRUID tenant ( Community or Enterprise).
- A configured Druid bot. For information on how to create a bot, see Creating Druid Bots.
- Microsoft Office 365 email is configured and activated as Email Channel.
- LLM and translation resources enabled on your tenant.
- Blob Storage credentials for secure attachment handling.
Configuring the Skill Template
To configure the skill template, follow these steps:
Step 1. Install the solution from the Solutions Library
- Go to Solutions Library and search for 'Email Case Handling Agentic Solution'.
- Import the solution by following the instructions provided in section Installing Solution Templates.
- Wait until the import status shows "Success".
Step 2. Activate Email channel
After importing the solution, navigate to Bot Settings. Click the Channels tab and activate the Email channel by following the instructions described in Email Channel.

Step 3. Set up the bot special flows and enable KB usage
Go to the bot settings, Details page and click the Dialog management section header. The section expands. Select the following special flows:
|
Special Flow |
Select |
|---|---|
| Welcome flow | welcome-email |
| Exception flow | global-exception-flow |
|
Intent rephrase flow |
rephrase-flow-email-handling |
Turn on the Use Knowledge Base toggle.
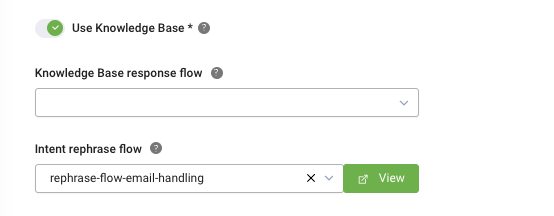
Save the changes.
Step 4. Configure the apps connection
To configure the app connection, follow these steps:
- Go to Solution Content > Apps and configure the connections with your credentials.
- Community: *.community.druidplatform.com/api
- Production West Europe: *.druidplatform.com/api
- Production US: *.us.druidplatform.com/api
- Production Australia: *.au.druidplatform.com/api
- Once the apps are configured, click Publish.
| App | Description | Your details |
|---|---|---|
| SendGrid | Sends email responses. | API Key or SMTP connection |
| DRUID-SLM_Becus 1.0 | LLM processing using DRUID-dedicated model. | Claims and token from Druid Services |
| Druid GPT | LLM processing using Open AI model. | Claims and token from Druid Services |
| Azure Blob Storage | Stores attachments. | Account Name and Account Key |
| KB-REST | Adds answers to Knowledge Base | The username and password of a Druid user account. In the Base URL field, enter the url specific to your environment:
|
| DRUID-Translator | Translates PDFs and attachments to bot’s default language. | DRUID support must enable TranslatePdf permission; retrieve the auth key from Druid Services and enter in app variable. |
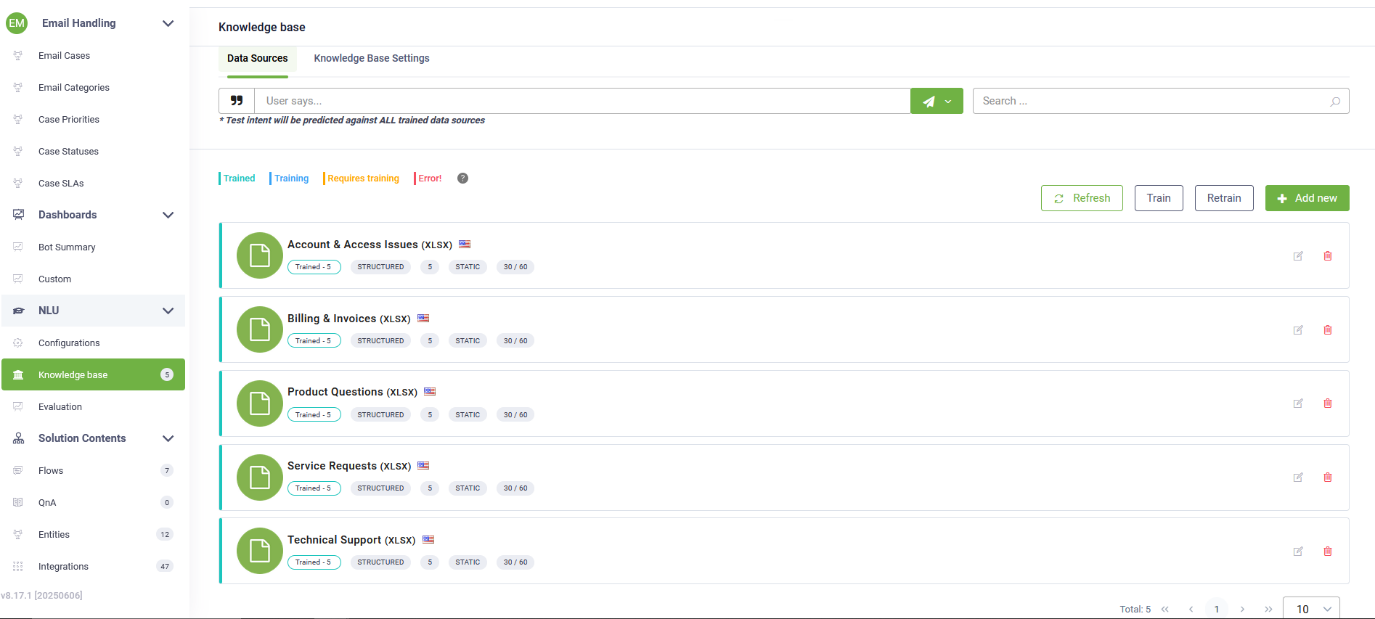
Step 5. Prepare the Knowledge Base
- Navigate to NLU > Knowledge Base.
- Click the Add new button.
- Enter the data source Name exactly as: "Ticket Management Standard KB".
- Choose Structured Documents as the data source Type.
- Upload the sample Excel file or your own set of standard answers.
- Set the Min score threshold to 30 and Target match score to 60.
- Click Create, then Extract, and finally Train the new data source.
Once training is complete, the Knowledge Base is ready to deliver standard responses for various types of case requests.
Step 6. Run setup flow
Open a new web chat with the bot. This will trigger the database setup workflow automatically, adding all necessary LLM prompts and demo data to the operational database.
Confirm that Email Cases view and admin records are created.
Step 7. Configure NLU Intents Classification with LLM
To configure NLU intents classification with LLM, follow these steps:
- Navigate to NLU > Configurations > Intents tab.
- Click on Thresholds and parameters.
- Add the NLU.NER.Classification.ModelType parameter and set it to LLM.Click the link that appears in the message below the NLP parameters.
- In the expanded section, choose Druid for Endpoint Type and for Model Name you can choose between Druid GPT or Becus.
- Click Set default for both prompts to auto-fill them.
- Click Save and train the bot.

Step 8. Configure LLM Model Connectors
- Navigate to Integrations to find the provisioned connectors for Druid Becus and Druid GPT.
- For each integration, copy its unique Connector action ID.
- Go to the Admin Workspace and select the LlmModel entity.
- For each LLM record (Becus and Druid GPT), paste the corresponding Connector action IDs into the following fields:
- For Becus:
- AgentConnectorId: Paste the ID from the DRUID-SLM-agent-run integration.
- GenericLlmConnectorId: Paste the ID from the DRUID-SLM-generic-connector integration.
- KBResponseConnectorId: Paste the ID from the DRUID-SLM-KB-response integration.
- For Druid GPT:
- AgentConnectorId: Paste the ID from the gpt-agent-run integration.
- GenericLlmConnectorId: Paste the ID from the GPT-generic-connector integration.
- KBResponseConnectorId: Paste the ID from the GPT-provide-KB-response integration.


Step 9. Select Active LLM
The solution uses a ModelSwitch variable to determine which LLM is active. By default, it is set to Druid GPT. To change it:
- From the Admin Workspace menu, select ModelSwitch.
- In the ModelSwitch view, click on the Current Value record. The Current Value form opens.
- From the SelectedModel field, select the desired LLM (e.g., Becus).
- Click the Save & close icon at the top-right corner of the page.


Step 10. Associate Druid Users with Helpdesk Roles
For an agent to access the Helpdesk Dashboard workspace and all its functionality, their DRUID platform account must be linked to a corresponding agent profile within the solution.
First, ensure a Helpdesk Agent record exists for the user. In the Helpdesk Dashboard workspace, go to HelpdeskAgent entity and create an agent record using the same email address as the person's DRUID platform login.
Next, assign the necessary platform roles to the DRUID user account:
- Helpdesk Agent: Assign this role for standard agent access (views for Cases and Contacts).
- Helpdesk Manager: Assign this role for full administrative access (views for Reporting, Cases, Contacts, Agents, and Queues).

The user can now log in to the workspace with the permissions defined by their assigned role.
________________________________________
Running the Solution
To create the first email case:
- Send an email to the configured Email Channel address.
- Include details and optionally attach files (images, PDFs).
- The bot automatically:
- Detects language
- Classifies category, status, priority, SLA
- Translates attachments and email content
- Extracts parameters
- Generates a KB suggestion if available
- In the Email Case view and forms the agent will be able to find:
- Original Email and attachments
- Translated Email and attachments
- Collected parameter
- Case description with all extracted info, missing parameters, and history
- Agents can review, reply, or close the case. Responses are automatically translated to the user’s language.
Hello,
My Wi-Fi is acting strangely and I cannot connect at all.
Could you please help?
I have attached an image showing the issue and a log file.
Thank you,
Alex